

Lesson 2
I'm starting this book assuming that you have learned no handwriting at all. And even if you had, the skills you have are not going to be the same as the ones you need for writing cursive. Cursive means the running script, where letters are joined together with lines called ligatures, or connecting lines. This means that you can write quite fast without picking your pen up from the page, and this has distinct advantages.
It also helps with memory and learning words, as our brains learn a connected word as one lump. But if we write a word out in separate letters, our brain has to connect all those letters together and then form the word, and this actually slows down our learning of words. So it's a good idea to write in cursive if you want to become someone who learns how to think really well, very fast.

The first lesson is actually the most difficult. All we're going to do is draw a slanted line, like the forward stroke on your keyboard, or the forward stroke you see at the start of a website address. We have to draw these all at the same angle and equally spaced.
It's actually very hard to do, and most students struggle with it a great deal. But if you can master this, then you have 90% of cursive writing done. If you cannot, your writing will look absolutely awful. And so it's worth spending a lot of time, and many pages, just drawing many, many lines. And we will give you some worksheets to do this, and instructions for how to check that your angles are good.
Let us begin.
In the beginning, we are going to make our slanted lines double height, so over two lines. And what you're going to do is this. You're going to draw a line that is parallel to the line that's on the page. And we are going to try to get the spacing equal. So whatever space you start with is the space you go on with. Every single one needs to be the same space away from the one before.
I'm not going to tell you how close they should be. Not too close, but certainly not further away than the width of your little finger.
And then you draw it from the top down. And you draw it to try to get it straight and on the same angle.
After you've drawn about four or five of them, get a ruler and put it on the page and run it across. Line it up on the first one, and then move it across and see if all of the others are on the same angle.
What you'll find is that some people actually end up writing the angles backwards. They start sloping backwards, or they start sloping forwards too much, or the lines start curving. This will happen. It will take some time until you can get a row of equally spaced, beautiful, straight lines.
This is very important, because these sloping forward lines that are equally spaced give the beauty and the skeleton to cursive writing. If you can't get them right now, your writing will never look good.
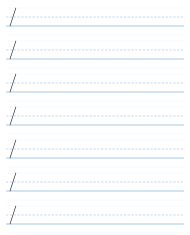
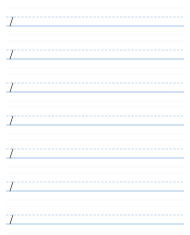
On the next page, we are going to reduce the height of these slopes to just the height of one line. And we will continue.
I'm going to make a few comments here. Firstly, your line can be more upright than mine, or it can be falling over forwards more than mine. But what it cannot be, and must not be, and may never ever be, is falling over backwards. That is not allowed. But it can fall over forwards more. If it does, if you choose to make your slopes more steep, then they must all be steep, and they must all be the same. So whatever your starting slope is, that is how your slope is as you go along.
You need to check with the ruler, and you must be very strict with yourself. Your lines will start to change their slope, because you're not going to be able to keep them the same slope the whole way across in the beginning; very few students can. So don't feel discouraged, don't feel sad, just keep doing it, because your brain will eventually learn how. You've just got to keep doing it with your hand and your pen on the page.
So we continue, and we're going to do at least two pages. I know you're going to think I'm awful and very strict and a very hard teacher, and you're going to hate me. But in the end, when your writing is beautiful, you will be very proud.
So what you're going to do is you're going to do two pages of sloped lines, and you're going to check them with your ruler to make sure that they are all sloping the same way. And you're going to check them with the ruler to check that they are all the equal distance apart. So all sloping the same slope, and all of them the same distance from one another.
You decide how far they're going to be apart from each other. Don't make them too close, because then you're just making a rod for your own back. Don't make them too far away, because then you're not doing enough practice. As I said, the most distance should be the width of your little finger, but probably half of that.
So we're going to do it now on single lines, and we're going to do two pages of sloped lines.
Cursive — Part One: The Small Letters · Evan Millner · Published by Abecedaria Press